Connect the ScreenCast to Your HDTV
Your TV must have an available HDMI™ port and an available USB™ Type-A port*

• Plug the HDMI™ connector into an available HDMI™ port on the display
• Plug the USB™ connector into an available USB™ Type-A port on your display
• If a USB™ port is not available on your display, you can connect it into a wall outlet using a power adapter.

• Turn on your display to power up the ScreenCast and select the input until
you see the setup screen.
• If your display remains black, your display may not be supplying enough
power. In this case, please plug the USB™ cord into a USB™ power adapter and
connect it to an outlet.
• Plug the TX into a USB-C® port on a laptop or mobile device. Wait a few
seconds until the flashing light on the TX stops, then it will start mirroring
automatically.
• If the TX flashes for more than 20 seconds, unplug it and then plug it back
in. If it flashes for more than 20 seconds again, it will need to be paired to the
RX (See the section titled "How to pair the TX with the RX" below). Note: TX
supports up to 1080p resolution.

Press the TX button to stop or restart mirroring.

1. It's required to switch the RX to Admin Mode (please refer to "Switch between Point to Point Mode
and Admin Mode") before casting a device with the TX.
2. The TX supports mirroring for all laptops and mobile devices running Windows®, macOS®, iPadOS®,
and Android™ operating systems. The USB-C® port on the device must also support DisplayPort™
Alternate Mode.

1.Due to the limitations of Miracast™ 1.0, the output resolution of the source device will be limited to 1080p, 720p, and 480p. The RX will upscale the source resolution up to 4K with 4K display.
*The Point to Point mode is enabled by default on the JVAW62T76R. This mode
allows the device to cast directly without a Wi-Fi® connection.
1. Keep the RX powered on, then insert the pin to press the reset button on the RX
for 1 second to switch between Point to Point Mode and Admin Mode.
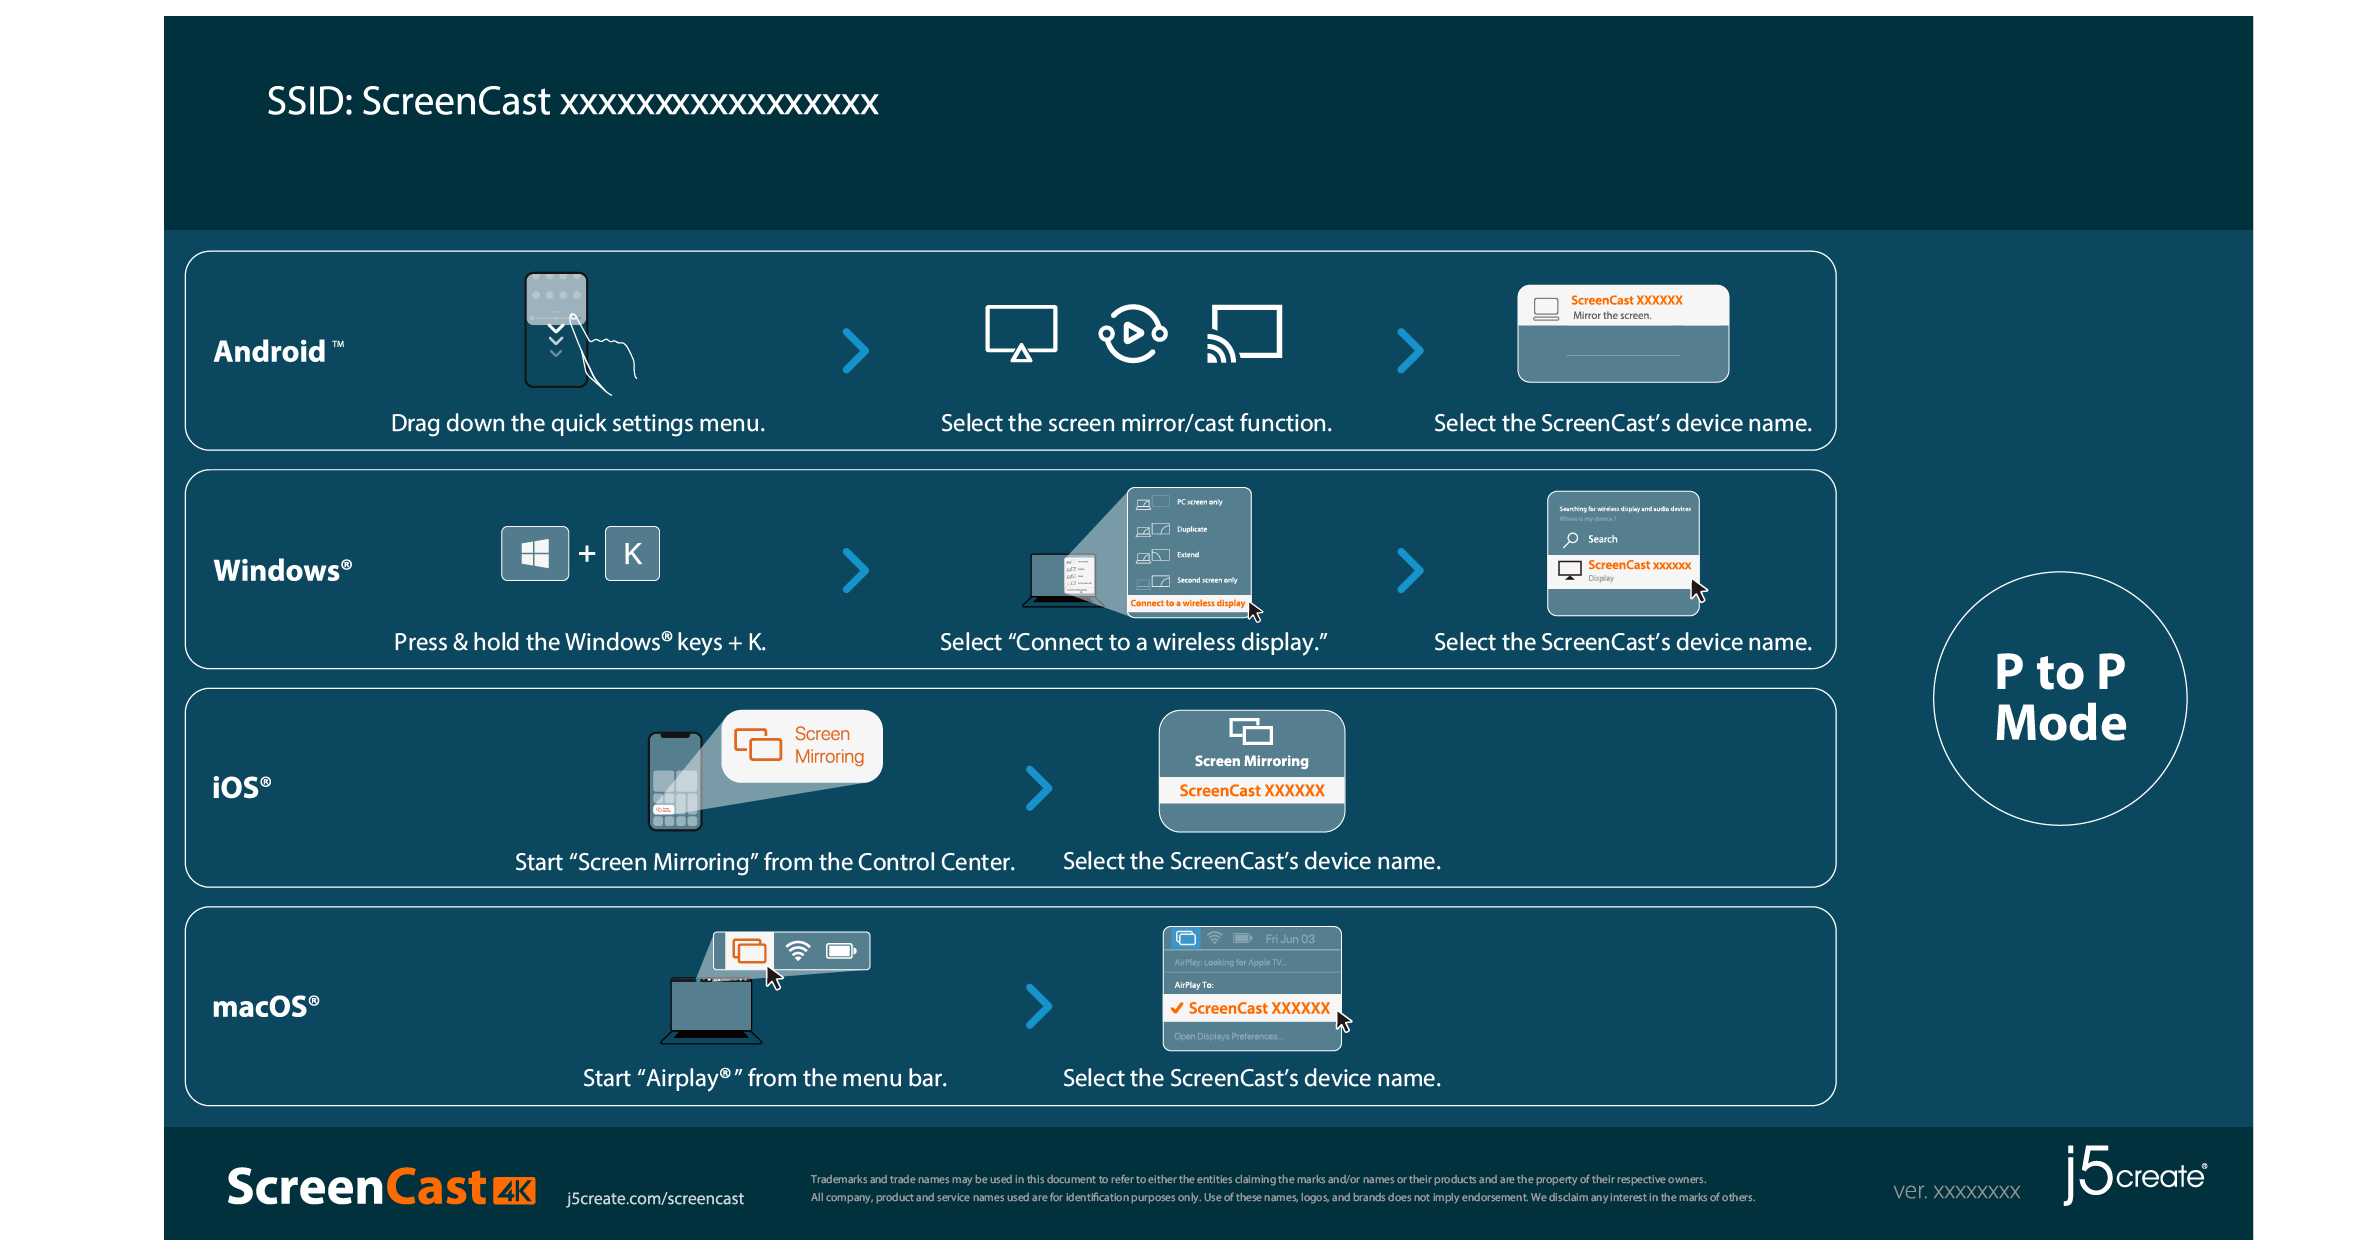
2. Point to Point mode only supports Miracast™ and AirPlay®. The Settings Menu
(http://192.168.203.1) will be unavailable in Point to Point mode.
1. Switch the RX to Admin Mode, then connect your device's Wi-Fi® with the SSID
(ScreenCast xxxxxx) and password shown on the display
2. Open a web browser and go to http://192.168.203.1 (Admin default password:
0000)
3. On the Settings Menu, click "Pincode" and set "Pincode Enable" to "On".
4. A random Miracast™ pin will be shown on the display. Only after inputting the
correct Miracast™ pin, will the display start to mirror the video. Note: Pincode fea-
ture only works for Miracast™
1. Switch the RX to Admin Mode, then connect your device's Wi-Fi® with the SSID
(ScreenCast xxxxxx) and password shown on the display
2. Open a web browser and go to http://192.168.203.1 (Admin default password:
0000)
3. On the Settings Menu, click "UI Background". Then choose the image file and
click "OK" to upload it.
Note: The image file must be 1920 x 1080 resolution, in JPG format, and less than
1MB in file size.
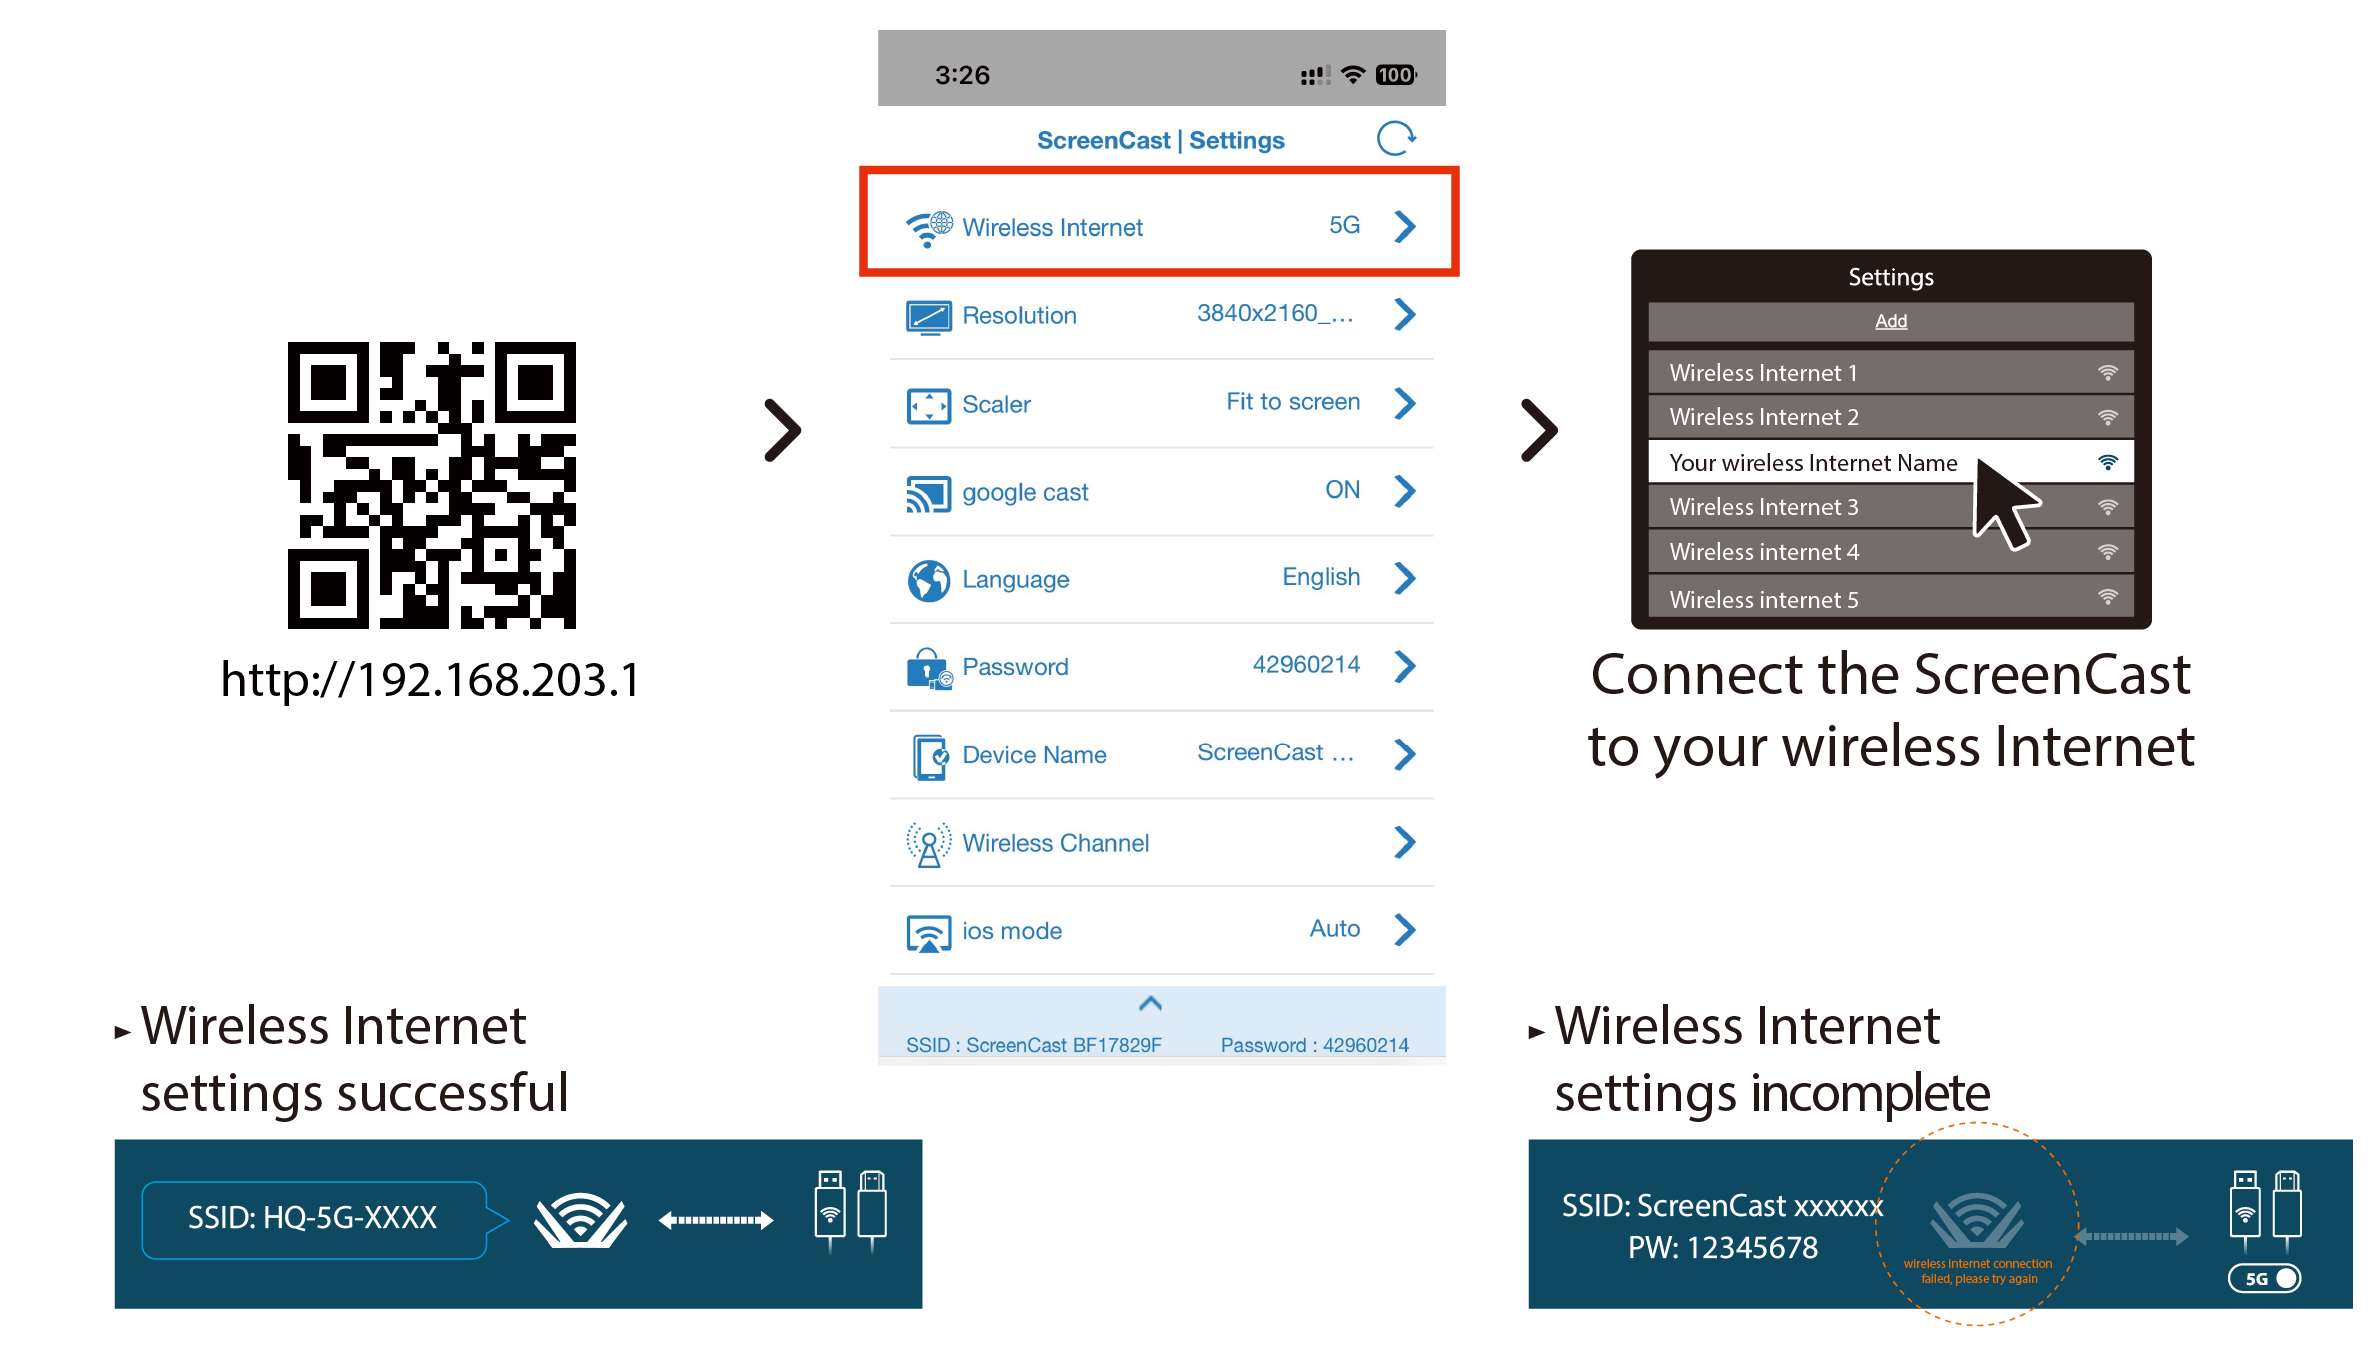
1. Go to your device's wireless Internet settings and search for the ScreenCast's SSID. Connect with the ScreenCast's SSID and input the password. The PW number is shown below the SSID on the home screen.

2. Open your web browser and go to http://192.168.203.1 and enter the admin gateway
(USER: admin , PASSWORD: 0000).
3. Choose wireless Internet settings and search for your router's SSID. Select your
wireless Internet and input the password. The Admin gateway will disconnect
while the ScreenCast is connecting to your wireless Internet.
Press the reset button (or insert the pin to press) for 2 seconds on the RX. Release the button when the screen shows "Release the button to pair with ScreenCast".
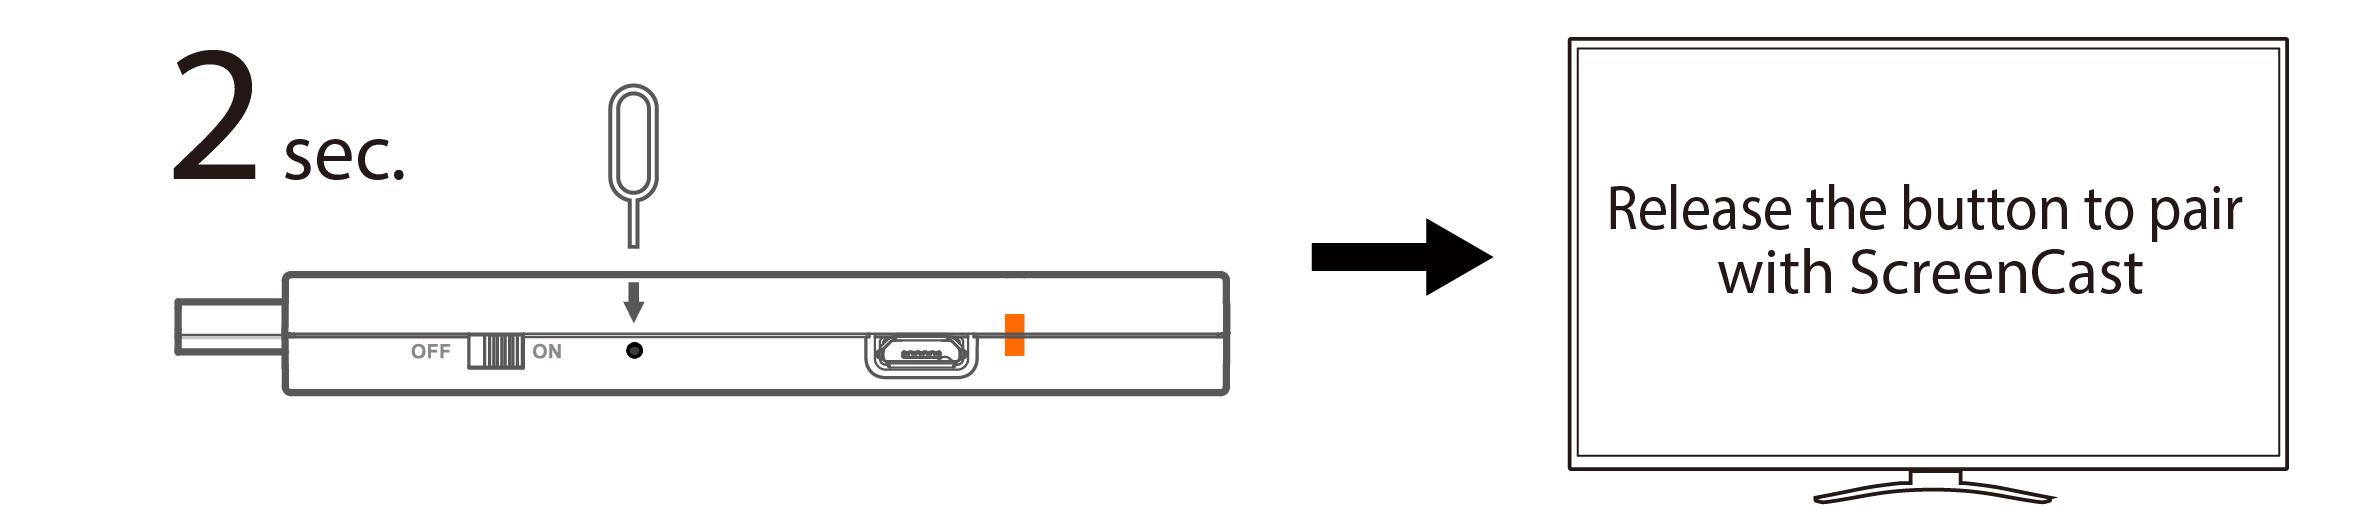
The reset button on the RX has 3 functions, which function is performed depends on the duration the button is held down.
(1) Press and hold for 1 second: Switch to Point to Point mode.
(2) Press and hold for 2 seconds: Turns on pairing mode for the TX.
(3) Press and hold for 10 seconds: Resets the receiver to default.
(Note: You can also start pairing mode within the ScreenCast settings instead of using a pin.)
Plug the TX into the laptop or mobile device to provide power.
Press the TX button to complete pairing when the screen shows "Ready to pair".
